The programs required to accomplish this are:
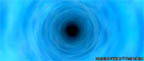
Here is the final version that I have created. The file is in Quicktime format, compressed with Sorenson 3 Video at 512x218 resolution. File size is 963KB.
Start a new file. Create a tube in the Front view with the following settings showed in the image below. To make things easier for new users, make a tube of any size. Then, change the size in the Modify Tab. After creating the tube and adjusting its size, move it to the zero origin (this makes it easier when working with multiple objects). If you're using 3ds max 4, right mouse click on the tube and scroll down to Properties. For Motion Blur, make sure that it is checked and that the Multiplier is set to "0.25" in "Image" mode.

Now, make a cylinder that is around the same diameter as the tube (make it a little bit bigger in diameter). The thickness doesn't really matter but don't make it too tall/long. This is going to be used to cap the end of the tube that you have created.
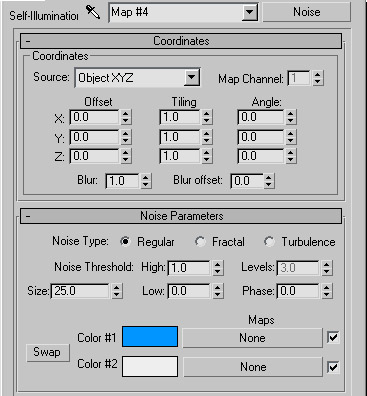
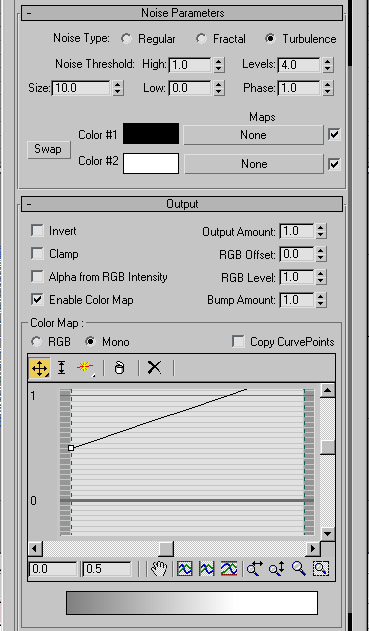
Open up the Material Editor. For the first texture, set the Self-Illumination to color and change the color to white. Make the Ambient and Diffuse colors white, too. In the Material Editor, scroll down to Maps and make it display the list. For Self-Illumination, click on the "None" box to add a map. When the list opens, choose "Noise". Put the following settings:
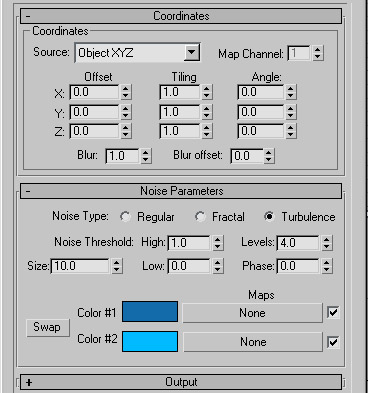
Now, go up to the parent material so you can see the list again. Click "None" for Opacity to choose a map. Pick "Noise" and put in the following settings:
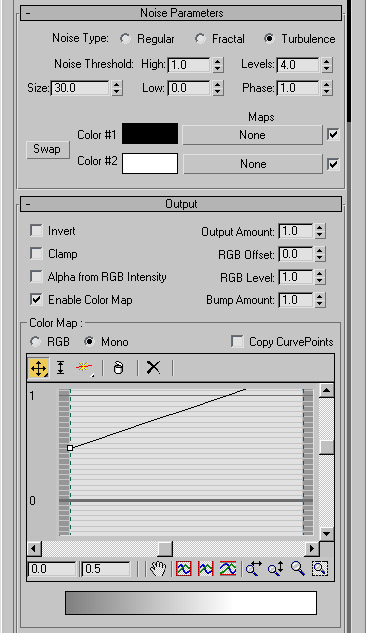
You need to clone this material once. Drag the sphere in the Material Editor than shows your material and drag it over one box. This should have cloned it. In the Material Editor where it says "1 - Default" or the material name, change it to something different like "2 - Default". This will make the cloned material different. The reason we are cloning the material is because there is going to be more than one tube used for this project. Now, change the settings of the Self-Illumination to these:
And the Opacity to these:
On the third window at the top (material 3) in the Material Editor, change the Diffuse color to black.
Apply the first material to the tube. I applied a UVW Map to this tube, but I don't think it made a difference. The UVW Map should be a cylinder.
Duplicate the tube, or clone it. Change the size of it to this:
Step 6
Apply
the second material to this tube.
This should be it for the objects in this project.
Step 7
Time to set up the camera. Set a Free Camera in the Front view. Make sure to put it at the origin too. This way, the camera won't fly off away from the cylinder.
Step 8
With the camera selected, hit the Animate button on then off. Move the time bar at the bottom to the end. I used the default 100 frames. Hit the animate button and move the camera through the tube until it gets to around 800 in the Y axis. Give the camera a little spin by rotating it to almost a full circle. Make sure that the Animate button is on (or red). After animating the camera, click the Animate button to turn it off.
Go to "Render->Environment" and change the background color to white.
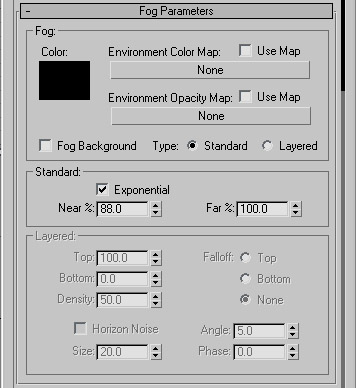
Then, add Fog. Use these settings:
Finally, render time. I used the widescreen aspect ratio. This can be changed in the Render Scene window. It's located in the Output Size. Change it from Custom to 35mm Anamorphic (2.35:1). For optimum quality, render the scene uncompressed.
Open up Adobe After Effects. Create a new project with the resolution that you used for the 3dsm4 render.
Import the
clip into the timeline. In the menu on the top, go to "Effect->Adjust->Brightness
& Contrast". Change the Brightness to 24.5 and the Contrast to
45.7.
That's the end of this tutorial, hopefully you got the same results or
better. If there are any questions or comments, feel free to email me.